
Some evenings, you want dinner to feel like a small reward. You want something warm and satisfying, with a crisp coating you can hear when you cut into it. But you may not want to spend your evening standing over a pan of hot oil.
These oven fried chicken thighs give you another way to prepare that comforting meal. You coat the chicken with seasoned flour, egg, and lightly oiled breadcrumbs, then bake it on a rack so heat can circulate around the pieces.
You’ll find the complete method below, along with ingredient guidance, troubleshooting tips, and storage instructions. Whether you’re cooking for your family or preparing a few meals for yourself, the goal is straightforward: well-seasoned chicken, a golden coating, and clear instructions you can follow.
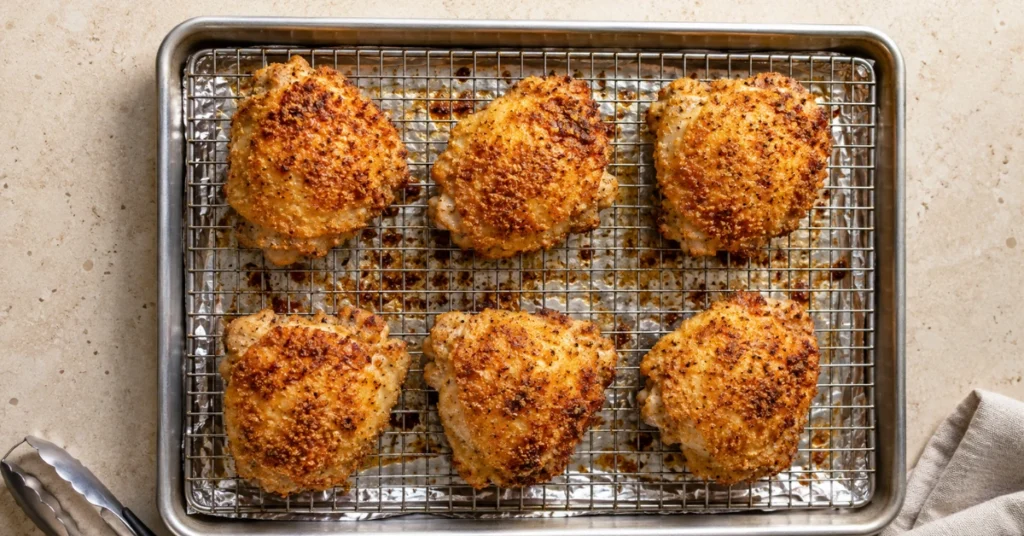
Table of Contents
Why Make Oven Fried Chicken Thighs?
Chicken thighs suit this cooking method because their richer meat holds up well to oven roasting. The breading adds texture, while paprika, garlic, and onion powder give the coating flavor without requiring a long ingredient list.
You also get several practical benefits:
- You bake the chicken in one batch.
- You use a measured amount of oil.
- You can prepare a salad or another simple side while it cooks.
- You can adjust the seasonings without changing the basic method.
“Oven fried” describes the result you’re aiming for, rather than the cooking technique itself. Your chicken is baked, and its breadcrumb crust will have a different texture from a thick, deep-fried batter.
What Makes Oven Fried Chicken Thighs Crispy?
A crisp coating depends on how you manage moisture, fat, and heat.
First, you need a reasonably dry chicken surface. Excess moisture can make the flour gummy and prevent the layers from adhering evenly.
Next, you need a coating that is thick enough to cover the chicken without becoming heavy. A light flour layer, a thin egg coating, and firmly pressed breadcrumbs work together.
Finally, the outside needs some fat to brown. Mixing oil through the breadcrumbs helps distribute it instead of leaving dry, pale patches.
Why Use a Rack?
An oven-safe wire rack lifts the chicken above the liquid that collects in the tray. This gives hot air access to more of the surface and helps prevent the underside from sitting in drippings.
Use a rack designed for oven cooking. A cooling rack with unsuitable coatings or plastic parts does not belong in a hot oven.
Ingredients for Oven Fried Chicken Thighs
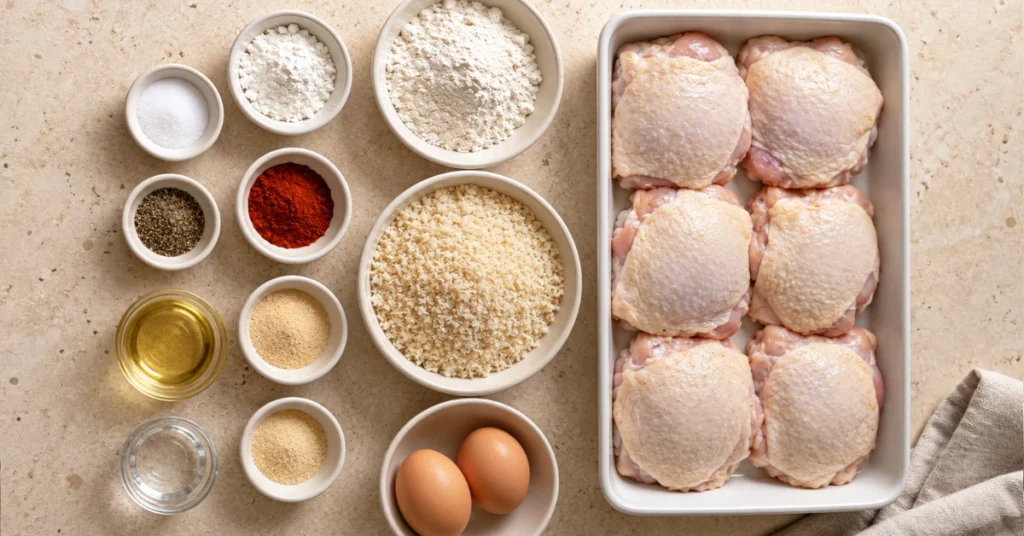
This recipe uses six bone-in, skin-on chicken thighs, weighing approximately 2½–3 pounds (1.1–1.4 kg) altogether. Choose pieces of similar size so they finish cooking closer together.
| Ingredient | Quantity | Purpose |
|---|---|---|
| Bone-in, skin-on chicken thighs | 6; approximately 2½–3 lb (1.1–1.4 kg) | Main ingredient |
| All-purpose flour | ½ cup (60 g) | Helps the egg coating adhere |
| Cornstarch | 2 tablespoons (16 g) | Part of the light flour coating |
| Plain panko breadcrumbs | 2 cups (approximately 120 g; check package weight) | Creates a coarse outer crust |
| Large eggs | 2 | Binds the breadcrumbs |
| Water | 1 tablespoon (15 ml) | Loosens the beaten eggs |
| Neutral oil | 3 tablespoons (45 ml) | Helps the breadcrumbs brown |
| Paprika | 2 teaspoons | Adds color and mild flavor |
| Garlic powder | 1 teaspoon | Adds savory seasoning |
| Onion powder | 1 teaspoon | Adds depth |
| Fine salt | 1 teaspoon, divided | Seasons the chicken and coating |
| Ground black pepper | ½ teaspoon | Adds gentle warmth |
| Oil spray | As needed for the rack | Reduces sticking |
Choosing Your Breadcrumbs
Plain panko gives you larger flakes than standard fine breadcrumbs. If you use a different breadcrumb style, expect a different coating texture and watch its browning carefully.
Choose unseasoned crumbs so you can control the salt and spices yourself.
Bone-In vs. Boneless Chicken Thighs
The main recipe uses bone-in thighs. Boneless pieces generally cook faster, but their thickness varies considerably.
If You Choose Boneless Thighs
Begin checking their temperature earlier. Do not use the bone-in timing as a fixed requirement, since leaving smaller pieces in the oven unnecessarily can dry them out.
If You Choose Skinless Thighs
The breadcrumb layer becomes your main source of exterior texture. Press it onto the meat gently and handle the pieces carefully when moving them.
For your first attempt, following the specified cut makes the result easier to assess.
Equipment You’ll Need
Before you begin, gather:
- A large rimmed metal baking sheet.
- An oven-safe wire rack that fits inside it.
- Three shallow bowls.
- Tongs.
- Paper towels.
- An instant-read food thermometer.
Line the baking sheet with foil for easier cleanup, then place the rack over it. The chicken sits on the rack, not directly on the foil.
How to Make Oven Fried Chicken Thighs
1. Preheat Your Oven
Heat a conventional oven to 425°F (220°C) and position a shelf near the middle.
Lightly grease the rack. Give the oven time to reach its temperature before adding the chicken; a partially heated oven changes the cooking and browning process.
2. Prepare the Chicken
Pat the thighs dry with paper towels. Trim any large, loose flaps of skin, leaving the skin covering the top of each thigh.
Season the chicken with ½ teaspoon of the salt.
You do not need to rinse raw chicken. Washing can spread bacteria around your sink and nearby surfaces. Wash your hands and clean your equipment after handling it.
3. Set Up Your Coating Bowls
In the first bowl, combine:
- Flour and cornstarch.
- Paprika.
- Garlic and onion powders.
- Remaining ½ teaspoon salt.
- Black pepper.
In the second bowl, beat the eggs with the water.
In the third bowl, toss the panko with the three tablespoons of oil. Stir thoroughly so the crumbs are lightly coated throughout.
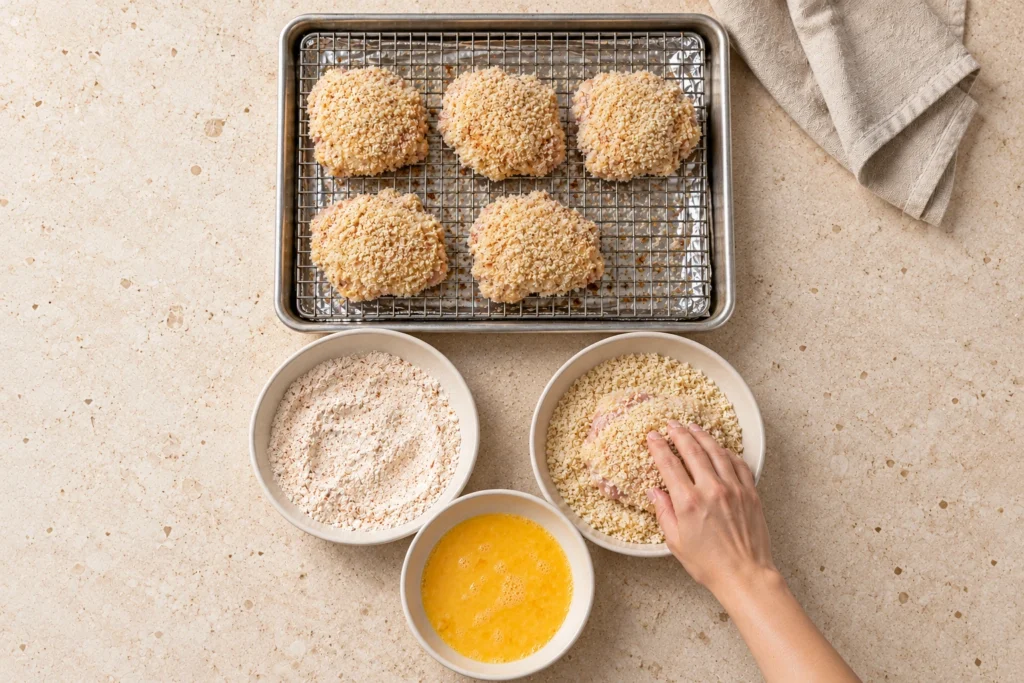
4. Bread Each Thigh
Work with one piece at a time:
- Coat it lightly in the seasoned flour.
- Shake off the excess.
- Dip it into the beaten egg.
- Let excess egg drip back into the bowl.
- Press it into the panko, covering the surface.
- Place it skin-side up on the prepared rack.
Leave space between pieces. If they touch, the coating along those edges may stay softer.
How to Keep the Coating Attached
Use one hand for the wet mixture and the other for dry ingredients, or use separate utensils. This prevents thick clumps from building up on your fingers.
Press rather than pile the crumbs onto the chicken. Once coated, move each thigh as little as possible.
Discard leftover coating mixtures that have touched raw chicken.
5. Bake Until Golden and Cooked Through
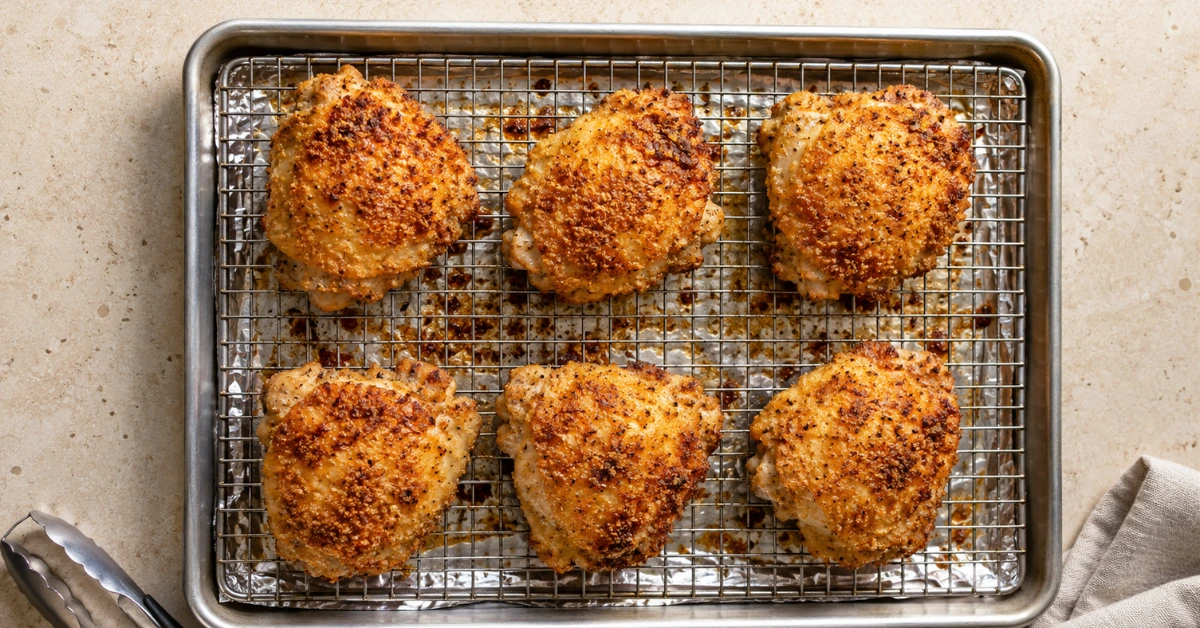
Bake for approximately 40–55 minutes, beginning temperature checks around 35–40 minutes. This is an estimated range, not a guarantee.
You do not need to flip the chicken for this rack method. If your oven browns unevenly, rotate the tray carefully.
Insert your thermometer into the thickest meat without touching the bone. Check individual pieces: chicken must reach 165°F (74°C) before you remove it from the oven. A golden crust does not prove that the center is safely cooked.
If the coating becomes dark before the chicken is ready, loosely shield the affected areas with foil and continue cooking.
6. Rest and Serve
Let the thighs rest on the rack for about five minutes.
Avoid covering the entire tray tightly, which traps steam against the crust. Serve with sauces on the side rather than pouring them over every piece.
Crispy Oven Fried Chicken Thighs
Ingredients
Equipment
Method
- Create separate steps for preheating
- Preparing the chicken
- Mixing the coating
- Breading
- Baking
- Resting
Troubleshooting Crispy Baked Chicken Thighs
| Problem | Possible cause | What you can do |
|---|---|---|
| Soft underside | Chicken touching drippings or crowded pieces | Use an elevated rack and leave gaps |
| Pale breadcrumb patches | Oil unevenly distributed | Mix the oil thoroughly through the crumbs |
| Coating slips off | Excess moisture or thick coating layers | Dry the chicken and shake off excess flour |
| Crust darkens too quickly | Strong top heat or uneven oven temperature | Move away from the element and shield loosely |
| Dry chicken | Cooking longer than necessary | Check temperature earlier |
| Uneven cooking | Different-size pieces | Check thighs separately and remove finished ones |
Should You Broil the Chicken?
You may be tempted to broil pale crumbs at the end, but breading can burn quickly under direct heat.
Focus first on adequate preheating and even oil distribution. If you choose to finish under the broiler, use broiler-safe equipment, watch continuously, and stop as soon as the coating colors.
Broiling is optional; it is not a substitute for cooking the center thoroughly.
What to Serve with Oven Fried Chicken Thighs
Choose sides that fit your available time and oven space.
For a comforting dinner, serve your chicken with mashed potatoes and green beans. For a lighter-feeling plate, try a crunchy slaw or a salad with a sharp dressing.
Other useful options include:
- Roasted carrots.
- Corn on the cob.
- Potato wedges.
- Steamed broccoli.
- Cucumber and tomato salad.
If you roast vegetables at the same time, use a separate tray and account for their shorter cooking time. Additional trays can also change airflow and browning, so check both dishes rather than relying only on the clock.
How to Store and Reheat Leftovers
Refrigerating Your Chicken
Refrigerate leftovers within two hours, or within one hour when the surrounding temperature exceeds 90°F (32°C). Use shallow containers and keep your refrigerator at 40°F (4°C) or below.
Eat refrigerated cooked chicken within three to four days.
Freezing for Another Meal
Pack portions in freezer-safe containers, separating layers to protect the coating. Label them with the date and aim to use them within two to three months for quality.
Thaw overnight in the refrigerator. Expect some texture change after freezing; the coating may not return to exactly its freshly baked crispness.
Reheating Without Making the Crust Soggy
Place refrigerated thighs on a rack over a tray in a 375°F (190°C) oven. Begin checking after approximately 15 minutes and continue until the center reaches 165°F (74°C).
Actual time depends on size and starting temperature. A microwave is quicker, but it tends to soften breading. USDA recommends reheating leftovers thoroughly to 165°F.
FAQs About Oven Fried Chicken Thighs
Can You Make Oven Fried Chicken Thighs Without Buttermilk?
Yes. This recipe uses beaten eggs and water to attach the coating, so you do not need buttermilk or a long marinade.
Why Aren’t Your Oven Fried Chicken Thighs Crispy?
Check moisture, spacing, and oil coverage first. Wet chicken, touching pieces, or dry breadcrumb patches can all affect the crust. Also confirm that your oven was fully preheated.
Do You Need to Flip Chicken Thighs in the Oven?
Not for this rack-based method. Keep them skin-side up. Recipes that cook directly against a greased pan may use different turning instructions.
Can You Prepare the Chicken Ahead?
You can measure the dry ingredients and set up your equipment ahead. For the most predictable coating, bread the chicken shortly before baking rather than leaving it breaded overnight.
Can You Make the Recipe Gluten-Free?
You would need suitable replacements for both the flour and panko. Check seasoning labels too. Different blends behave differently, so treat that as a variation requiring its own test.
Can You Start with Frozen Chicken?
Use fully thawed chicken for this breading method. Surface ice and excess moisture interfere with the coating, while the timing above assumes thawed pieces.
Conclusion: Make Your Next Chicken Dinner Worth Sitting Down For
Good oven fried chicken thighs come down to a few manageable details: dry the surface, build an even coating, give the pieces space, and check their temperature.
You do not need an elaborate menu around them. Pick a side you enjoy, serve the chicken while the crust is fresh, and bring dinner to the table.
Save this recipe for the next chicken night. After you make it, leave a comment with the cut you used, your cooking time, and your favorite side—you may help another reader plan their dinner.
1 thought on “Crispy Oven Fried Chicken Thighs: Golden Outside, Juicy Inside”